Upgrading your kitchen faucet can instantly elevate the entire space, but getting the hole spacing right is crucial for a seamless installation. Whether you’re a seasoned DIYer or tackling your first faucet replacement, this comprehensive guide will walk you through the process, ensuring a flawless fit every time.
Understanding Kitchen Faucet Hole Spacing Basics
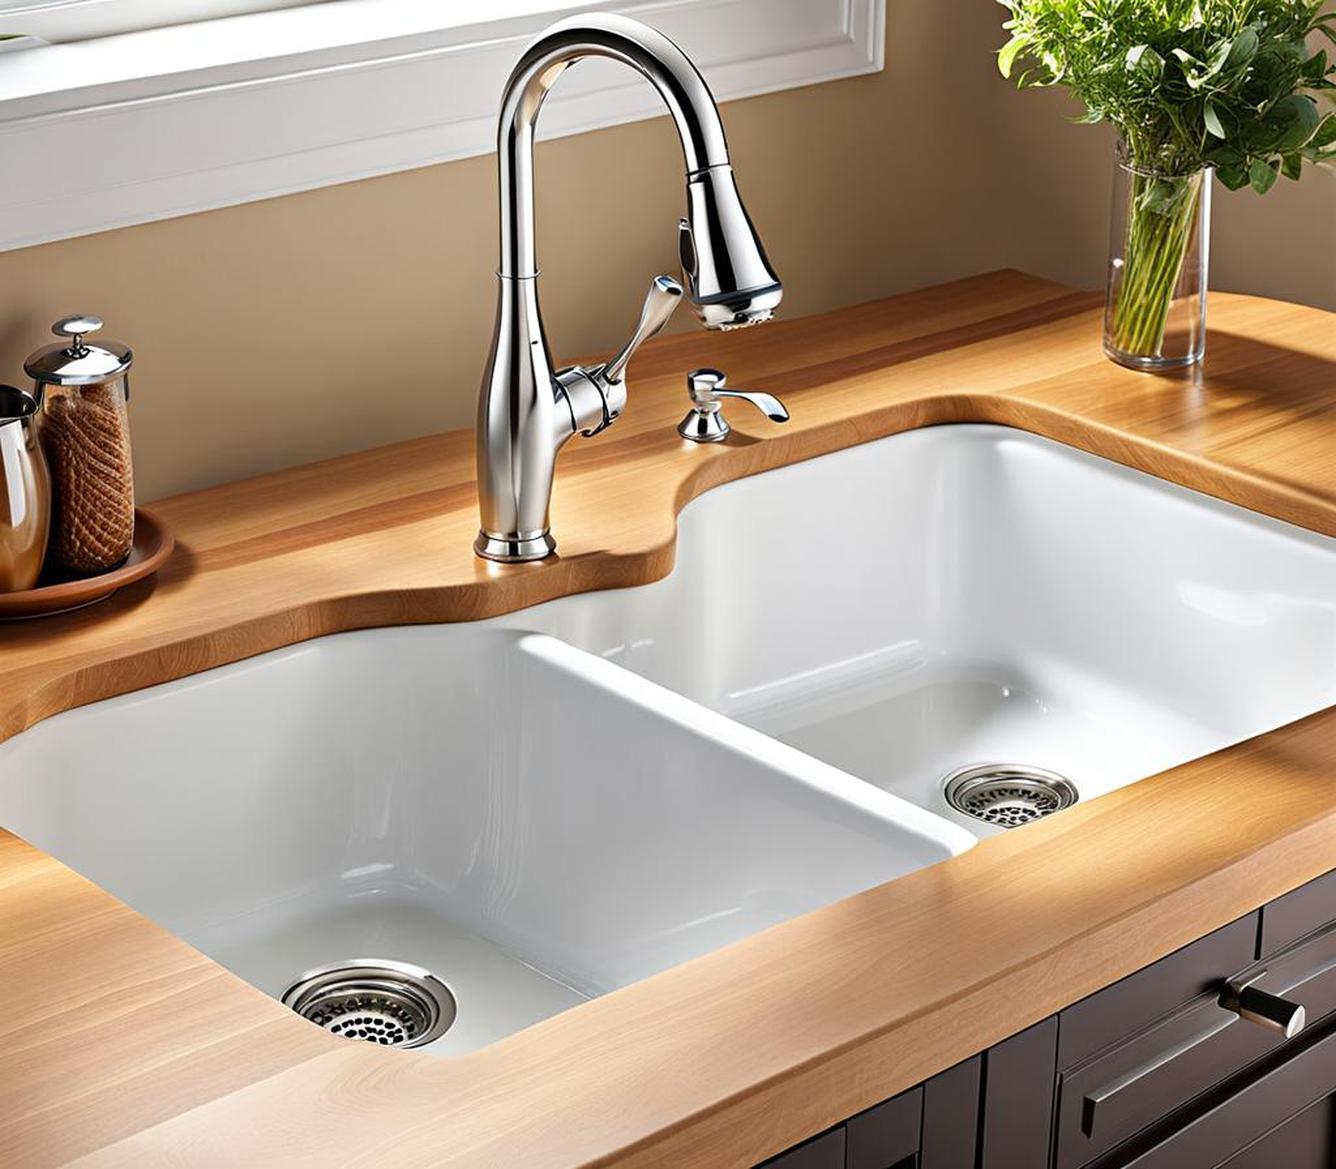
Before we dive into the nitty-gritty, let’s cover the fundamentals. Kitchen faucet hole spacing refers to the distance between the pre-drilled holes in your sink or countertop, which accommodate the faucet, handles, and any additional components like a sprayer. Proper spacing is essential not only for a secure installation but also for the faucet’s functionality and aesthetics.
While there are industry-standard measurements, hole spacing can vary depending on the manufacturer and faucet design. Typically, single-hole faucets require just one hole, while widespread or widespread lavatory faucets have three holes spaced 6 to 16 inches apart. Knowing these measurements upfront will save you a ton of headaches down the line.
Measuring Existing Sink/Countertop Holes
Before shopping for a new faucet, you’ll need to measure the existing holes in your sink or countertop. Grab a ruler or a caliper, and carefully measure the distance between the centers of each hole. Make note of not only the spacing but also the number of holes present. This information will be crucial when selecting a compatible faucet.
If your sink or countertop doesn’t have pre-drilled holes, or if the existing ones don’t match your desired faucet configuration, you may need to have new holes drilled. In this case, consult a professional to ensure precise measurements and avoid any costly mistakes.
Selecting the Right Faucet for Your Spacing
With your measurements in hand, it’s time to start shopping for the perfect faucet. Faucets come in a variety of styles and configurations, each designed to fit specific hole spacing requirements. Here’s a quick rundown:
- Single-hole faucets: As the name implies, these require only one hole and are ideal for smaller sinks or countertops with limited space.
- Centerset faucets: These have two handles and a spout that mount through three holes spaced 4 inches apart.
- Widespread/widespread lavatory faucets: These feature separate handles and a spout that mount through three holes spaced 6 to 16 inches apart, offering a more dramatic, spread-out look.
- Wall-mounted faucets: These require no sink or countertop holes and can be a great solution for cramped spaces or unique design preferences.
Be sure to double-check the faucet’s specifications against your existing hole spacing to ensure a proper fit. Don’t hesitate to reach out to the manufacturer or a plumbing professional if you have any doubts or questions.
Step-by-Step Guide to Installing a Faucet with Correct Spacing
With the right faucet in hand, it’s time to tackle the installation. Here’s a step-by-step guide to help you through the process:
- Gather your tools: You’ll need a basin wrench, pliers, adjustable wrench, and plumber’s putty or silicone caulk, among other basic tools.
- Remove the old faucet: Turn off the water supply lines and disconnect the old faucet, taking care not to damage the sink or countertop.
- Prepare the surface: Clean the area around the holes and apply plumber’s putty or silicone caulk to create a watertight seal.
- Install the new faucet: Follow the manufacturer’s instructions to mount the faucet components through the appropriate holes, ensuring proper spacing and alignment.
- Connect the water supply lines: Attach the hot and cold water supply lines to the faucet, being careful not to overtighten the connections.
- Test for leaks: Turn on the water supply and check for any drips or leaks around the faucet base and connections, making any necessary adjustments.
Remember, if you encounter any issues or feel unsure about any part of the process, don’t hesitate to consult a professional plumber. Your safety and the integrity of your kitchen are paramount.
Troubleshooting Common Spacing Issues
Even with careful planning, you may encounter some hiccups during the installation process. Here are a few common spacing issues and how to address them:
- Non-standard hole spacing: If your existing holes don’t match standard measurements, you may need to have additional holes drilled or opt for a faucet that can accommodate the unique spacing.
- Misaligned or off-center faucet: If your faucet appears crooked or misaligned, double-check the hole spacing and make any necessary adjustments to the faucet components or mounting hardware.
- Water flow issues: Improper spacing can sometimes cause water to spray or flow unevenly from the faucet. In this case, you may need to adjust the faucet position or consider a different model that better suits your sink or countertop configuration.
Don’t be discouraged if you run into a snag – with a little patience and problem-solving, most spacing issues can be resolved.
While functionality is paramount, you’ll also want your new faucet to complement your kitchen’s overall aesthetic. Here are a few design tips to help you achieve a cohesive, visually appealing look:
- Consider the finish: Match the faucet’s finish (brushed nickel, oil-rubbed bronze, etc.) to your existing hardware and appliances for a polished, coordinated look.
- Embrace the style: From traditional to modern, faucets come in a wide range of styles. Choose one that aligns with your kitchen’s design theme for a harmonious look.
- Mind the scale: Ensure the faucet’s size and profile are proportional to your sink and countertop dimensions, creating a balanced, visually appealing layout.
- Incorporate accents: Consider adding complementary accents, like a stylish soap dispenser or a coordinating sink strainer, to tie the entire look together.
With a little forethought and attention to detail, your new faucet can seamlessly blend into your kitchen’s aesthetic while adding a touch of functional elegance.
By following this foolproof guide, you’ll be able to confidently tackle your kitchen faucet installation, ensuring the perfect fit and a stunning final result. Happy renovating!

This is where you’ll find inspiration to create a stylish and beautiful dream home.