It’s an art that can elevate your home’s festive vibe. Whether you prefer a rustic, modern, or traditional aesthetic, these decorative accents offer endless possibilities to craft a how to make holiday urn filler that perfectly aligns with your style. Let’s delve into the world of stylish and affordable urn filler designs that will surely captivate your guests this holiday season!
Unleash Your Creativity: Fresh Holiday Urn Filler Ideas
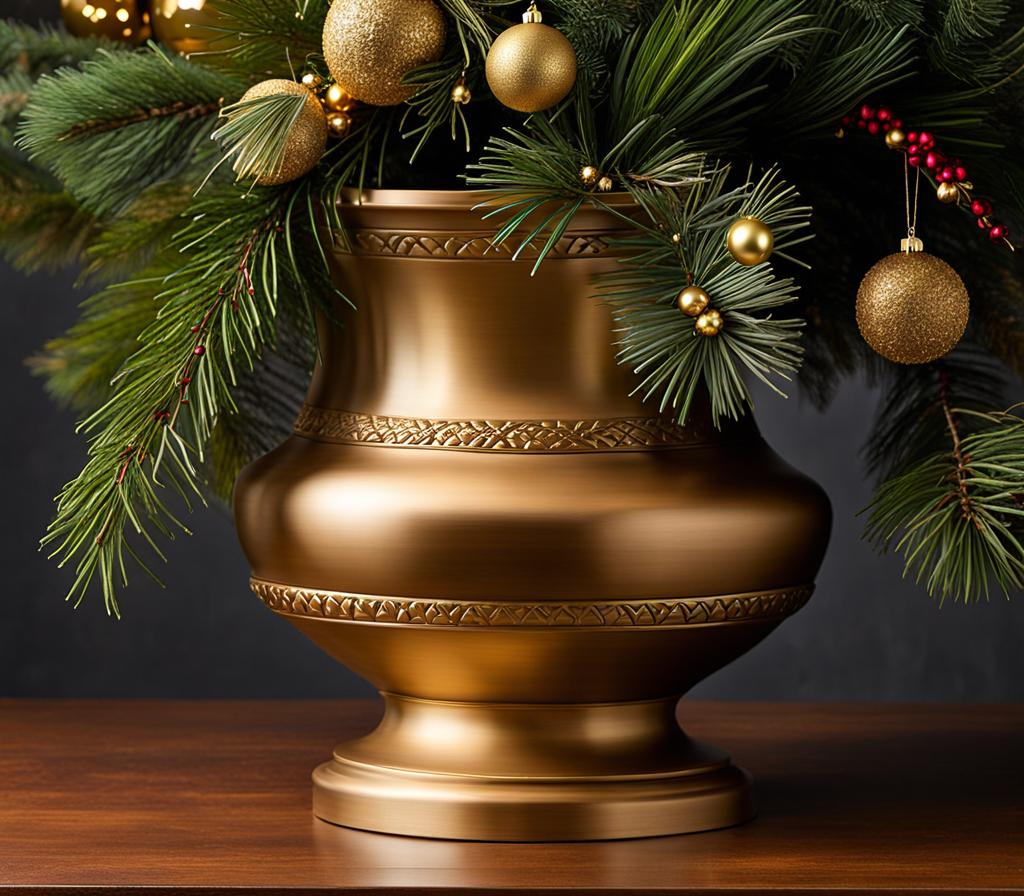
Holiday urn fillers are a delightful way to add a touch of festive charm to your home decor. From the cozy warmth of a rustic farmhouse-inspired design to the sleek elegance of a contemporary aesthetic, the possibilities are endless. Imagine a lush arrangement of pinecones, twigs, and dried oranges nestled in a distressed urn, radiating a welcoming and inviting vibe. Or perhaps you prefer a minimalist approach, where a simple yet chic combination of glossy ornaments and frosted branches takes center stage, exuding sophistication.
One of the most appealing aspects of crafting your own urn fillers is the cost-effectiveness. While store-bought options can be tempting, they often come with a hefty price tag and lack personalization. By embracing the DIY spirit, you can let your creativity flow, resulting in one-of-a-kind designs that not only reflect your unique style but also align with your budget.
Step-by-Step Guide: Crafting Stunning Holiday Urn Fillers
Before you dive into the world of urn filler crafting, gather your supplies. You’ll need a few essential items, such as urns (or any decorative containers), filler materials (pinecones, twigs, dried flowers, etc.), and decorative accents like ribbons, ornaments, or fairy lights.
Once you have your materials ready, it’s time to start assembling your masterpiece. Begin by creating a sturdy base with larger elements, like pinecones or branches. Then, layer in smaller items, such as dried oranges or berries, to add depth and texture. Don’t be afraid to experiment with different combinations and arrangements until you find the perfect balance.
As you craft, remember to incorporate personal touches that reflect your style. Perhaps you want to add a touch of whimsy by incorporating vintage ornaments or sentimental family heirlooms. Or, you might prefer a more minimalist approach, using clean lines and a monochromatic color palette. The beauty of DIY urn fillers lies in the freedom to express your unique aesthetic.
Nature’s Bounty: Incorporating Natural Elements
One of the most captivating aspects of holiday urn fillers is the opportunity to embrace nature’s bounty. From pinecones and twigs to dried flowers and berries, these natural elements add a warm, organic touch to your designs. Imagine a stunning arrangement featuring fragrant eucalyptus, vibrant red berries, and delicately frosted pinecones – a true celebration of the season’s natural beauty.
When working with natural materials, preservation is key to ensuring your urn filler maintains its charm throughout the holiday season. Consider techniques like air-drying or using a preservative spray to extend the life of your botanical elements. Alternatively, you can opt for dried or faux versions, which provide a low-maintenance option without sacrificing aesthetic appeal.
Embracing sustainable and eco-friendly practices is another way to infuse your urn fillers with a sense of harmony. Scour your local nature trails for fallen branches, pinecones, or dried flowers, and incorporate them into your designs. Not only will you be reducing waste, but you’ll also be creating a unique, one-of-a-kind piece that celebrates the beauty of nature.
Festive Flair: Adding Sparkle and Color
While natural elements bring a warm and organic vibe to your urn fillers, adding a touch of sparkle and color can take your designs to new heights. Imagine a vibrant arrangement featuring rich burgundy and gold accents, perfectly complemented by shimmering ribbons and twinkling fairy lights. Or perhaps you prefer a more understated approach, with pale pinks and creams adorned with delicate pearl embellishments.
When it comes to incorporating color, consider the overall theme and aesthetic you’re aiming for. A traditional Christmas palette might feature deep greens, reds, and golds, while a winter wonderland theme could showcase cool shades of blue, silver, and white. Don’t be afraid to experiment with unexpected color combinations – sometimes, the most striking designs emerge from unexpected pairings.
Achieving the perfect balance of colors and textures is key to creating a harmonious and visually appealing urn filler design. Start with a color palette that complements your existing holiday decor, and then layer in various textures, from velvety ribbons to glossy ornaments, to create depth and interest.
Budget-Friendly Alternatives: Repurposing Household Items
Crafting stunning holiday urn fillers doesn’t have to break the bank. In fact, some of the most unique and eye-catching designs can be created by repurposing everyday household items. Get creative and transform ordinary objects into extraordinary decorative elements.
For instance, you might consider upcycling old books or magazines into gorgeous paper cones or flowers. Or, if you have a knack for woodworking, you could craft charming wooden ornaments or figurines to incorporate into your urn filler arrangements. The possibilities are endless, and the satisfaction of creating something beautiful from unexpected materials is truly unmatched.
Embracing a thrifty mindset not only saves you money but also reduces waste and promotes sustainability. Scour your local thrift stores or flea markets for unique finds that can be transformed into one-of-a-kind urn filler accents. You might be surprised at the hidden gems you’ll uncover and the creative ideas they’ll inspire.
Urn Filler Maintenance: Keeping Them Fresh All Season
Once you’ve crafted your stunning holiday urn filler designs, you’ll want to ensure they maintain their freshness and vibrancy throughout the entire season. After all, there’s nothing quite as disappointing as a wilted or faded arrangement.
To keep your urn fillers looking their best, consider techniques like regularly misting dried or fresh botanicals with water to prevent them from drying out too quickly. You might also want to rotate your arrangements, ensuring that each side receives ample light and air circulation.
If you notice any wilting or discoloration, don’t hesitate to refresh your urn filler by replacing or rearranging certain elements. This simple act can breathe new life into your design and ensure it continues to captivate and delight throughout the holiday season.
To spark your creativity further, let’s explore a curated collection of eye-catching urn filler designs that cater to various aesthetics:
- Rustic Charm : Embrace the warmth of a cozy cabin with a combination of pinecones, burlap, and dried oranges, accented by sprigs of fresh or faux evergreens.
- Modern Minimalism : Create a sleek and sophisticated vignette with a monochromatic palette of white and silver, featuring metallic ornaments, frosted branches, and delicate feathers.
- Elegant Opulence : Indulge in a touch of luxury with a lavish arrangement of plush velvet ribbons, sparkling crystals, and gilded ornaments, all nestled amidst lush greenery.
Remember, your urn filler designs don’t have to be limited to the holiday season alone. Consider repurposing and adapting them for other festive occasions, such as birthdays, weddings, or even springtime celebrations. The key is to let your creativity flow and embrace the joy of crafting personalized decor that reflects your unique style and flair.
As you embark on your urn filler crafting journey, don’t be afraid to mix and match different elements until you find the perfect combination that speaks to your aesthetic sensibilities. After all, the beauty of DIY projects lies in the freedom to experiment and create something truly one-of-a-kind.

This is where you’ll find inspiration to create a stylish and beautiful dream home.
