If you’re looking to revamp your living space and give it a fresh, modern vibe, painting a popcorn ceiling with a roller is an affordable and effective solution. Popcorn ceilings, once a popular trend, can now appear dated and drab, but with a few simple steps, you can transform them into a sleek and seamless canvas.
Demystifying Popcorn Ceilings: What You Need to Know
Popcorn ceilings, also known as acoustic ceilings, were widely popular in the mid-20th century for their ability to absorb sound and hide imperfections. However, they can now make a room feel closed-in and outdated. Before we dive into the painting process, let’s understand the pros and cons of popcorn ceilings: – Advantages: – Offers sound insulation – Conceals ceiling flaws and irregularities – Relatively inexpensive to install – Disadvantages: – Collects dust and debris over time – Can be challenging to clean and maintain – May contain asbestos (in older homes) If your popcorn ceiling is in good condition and you’re looking for a cost-effective way to refresh your space, painting it with a roller is an excellent option. However, if the ceiling is severely damaged or contains asbestos, it’s best to consider professional removal.
Preparing for the Painting Process
Before you embark on your painting journey, it’s crucial to gather the necessary materials and tools. Here’s what you’ll need: – A high-quality primer designed for popcorn ceilings – Interior latex paint in your desired color (flat or matte sheen works best) – A thick-nap roller cover (3/4 inch or higher) – Extension pole for the roller – Drop cloths or plastic sheeting to protect floors and furniture – Painter’s tape – Putty knife or drywall knife (for repairing any damaged areas) – Ladders or step stools Safety should be your top priority, so make sure to wear protective gear like goggles, a dust mask, and old clothes. Additionally, properly ventilate the room by opening windows and using fans to circulate the air.
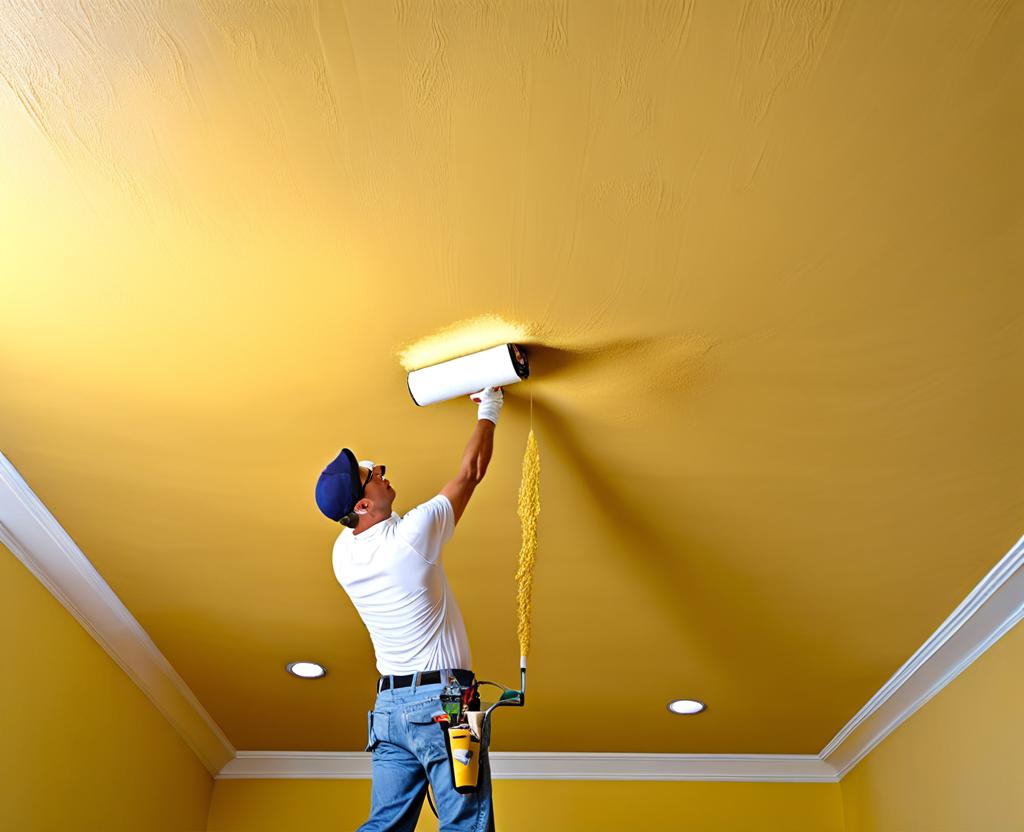
Step-by-Step Guide: Painting a Popcorn Ceiling with a Roller
Now that you’re prepared, let’s dive into the painting process: 1. Thoroughly clean the popcorn ceiling surface to remove any dust, cobwebs, or debris. A vacuum cleaner with a brush attachment works well for this task. 2. Repair any cracks, holes, or damaged areas using a putty knife and drywall compound. Allow the compound to dry completely before proceeding. 3. Apply a high-quality primer designed specifically for popcorn ceilings. This will help the paint adhere better and provide a uniform base for the topcoat. 4. Once the primer is dry, it’s time to start painting. Load your thick-nap roller with the latex paint and roll it onto the ceiling in a crisscross pattern. Work in small sections and apply the paint with even, overlapping strokes. 5. Pay close attention to the edges and corners, using a small brush or a roller with a angled handle to ensure full coverage. 6. Allow the first coat to dry completely, then apply a second coat for optimal coverage and a smooth, professional finish.
Expert Tips and Tricks for Flawless Results
While painting a popcorn ceiling with a roller is relatively straightforward, there are a few expert tips and tricks that can help you achieve flawless results: – Work in sections and keep a wet edge to avoid visible lap marks. – Use a high-quality paint and primer specifically designed for popcorn ceilings. They are formulated to adhere better and provide a smoother finish. – Consider tinting the primer with a similar color to your topcoat. This will help minimize the need for multiple coats of paint. – Take your time and be patient. Rushing through the process can lead to drips, uneven coverage, and a less-than-desirable outcome. – Avoid overloading your roller with paint, as this can cause drips and uneven application. – When painting corners and edges, use a small brush or an angled roller to ensure full coverage and a neat finish.
Benefits of Using a Roller for Popcorn Ceiling Painting
While there are other methods for painting popcorn ceilings, using a roller offers several advantages: – Cost-effective: Rollers and paint are relatively inexpensive compared to hiring professional painters or opting for ceiling removal. – Time-efficient: With the right preparation and technique, you can cover a large area quickly and efficiently with a roller. – Uniform finish: Rollers provide a smooth, even application, minimizing the risk of visible brush strokes or uneven coverage. – Minimal mess: Compared to spraying, using a roller is a cleaner and more controlled process, reducing the risk of overspray and mess. By following the steps outlined above and using a high-quality roller, you can achieve a professional-looking finish that will transform your space and breathe new life into your popcorn ceiling.
Maintenance and Care for Painted Popcorn Ceilings
Once you’ve completed the painting process, it’s important to maintain and care for your newly painted popcorn ceiling to ensure its longevity and beauty. Here are some tips: – Avoid scrubbing or vigorously cleaning the surface, as this can damage the paint and texture. – Use a soft brush or microfiber duster to gently remove any dust or debris that accumulates over time. – For stubborn stains or marks, use a mild soap and water solution and gently dab the affected area with a clean cloth. – Consider touching up any areas that show signs of wear or damage with a small brush and matching paint. If you plan to remove the popcorn ceiling in the future, it’s essential to take the necessary precautions and follow proper removal techniques to ensure your safety and the integrity of your home.
Once you’ve mastered the art of painting a popcorn ceiling with a roller, you can explore various design ideas and color schemes to complement your interior decor. Here are a few inspiring ideas: – Opt for a bold, accent color to create a focal point in the room. – Choose a soft, neutral shade to create a sense of calm and serenity. – Experiment with metallic or pearlescent paints for a touch of glamour and sophistication. – Consider painting the ceiling a different color than the walls for a contrasting and visually striking effect. – If you’re feeling adventurous, you can even create patterns or designs on the popcorn ceiling using stencils or freehand techniques. Remember, the possibilities are endless, and with a little creativity and the right tools, you can transform a dated popcorn ceiling into a stunning centerpiece that enhances the overall aesthetic of your living space.

This is where you’ll find inspiration to create a stylish and beautiful dream home.
